Dedication:
I take after my dad in more ways than one. One of the traits I inherited from him is not being afraid of do-it-yourself projects. Growing up, I always thought of my dad as a sort of polymath, or Renaissance man , and aspired to being similar when I got older. Nowadays I think I am just that, with the only thing lacking is my knowledge of sports.
Dad could build a room addition (and essentially doubled the size of our childhood home), do plumbing, electrical, roofing, landscaping, minor repairs on our cars, fix a broken TV or radio, as well as cook dinner, and would be happy to build us anything if we asked. All that I have learned from him about tools, troubleshooting and tackling jobs has made me decide to dedicate this project to him. Thanks, Pop!

Intro
Back in 1985 I bought my first good quality electric guitar. It was an Aria Pro II ZZ Standard. Later I would find out it was made in the famed Matsumoku factory in Japan. About 1990 I wanted to switch to bass, so I sold my beloved Aria Pro and got a bass. As much as I wanted a bass, I still felt bad about getting rid of the Aria Pro since it was my first decent instrument.
A few years went by and I stumbled upon a very cool vintage Carvin doubleneck and bought it and used it for a while until I needed a good six string guitar for the band I was in. I sold it to the Carvin guitar company (now Kiesel) for their museum who gave me credit toward an electric guitar (which I still have, thank you very much). But now my doubleneck was gone. It would have been cool to keep it. In 1995, I began the hunt for another Aria Pro II ZZ, but was taken aback when I found out they were selling for $300 or more. Japanese made guitars from the 1980’s were in demand again, and I was going to pay dearly if I wanted one. A couple of Cragislist ads I posted got me in touch with a guy in Boston who was willing to sell me two ZZ bodies and necks as well as a bagful of parts for cheap. The parts sat in my basement for three years before I did anything with them. Here they are in the photo that the seller sent me before I went down to meet him & buy them.

Getting started
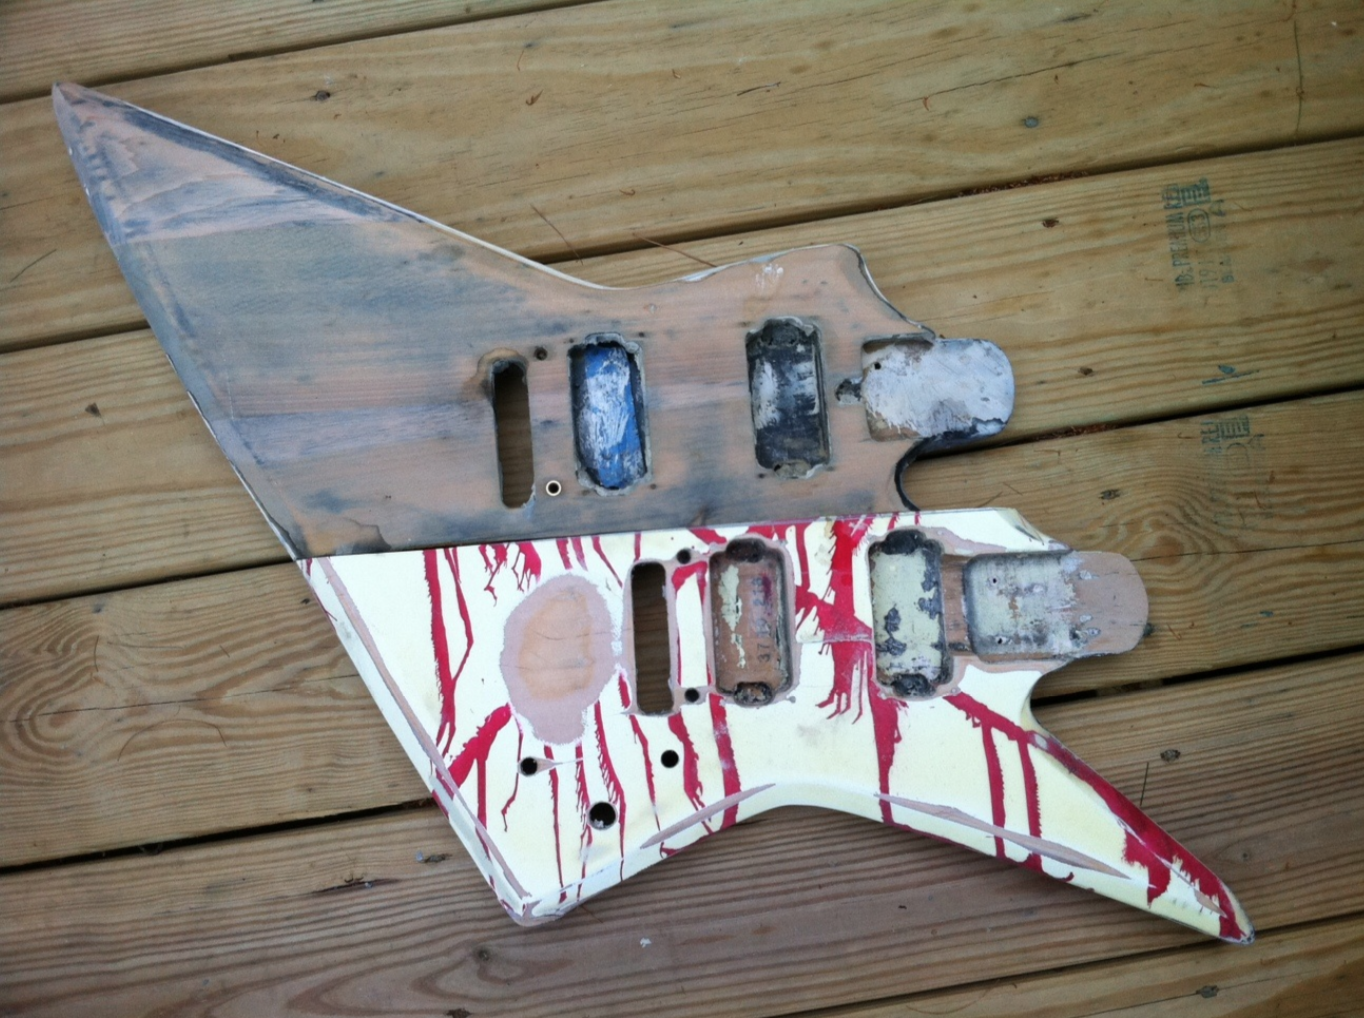
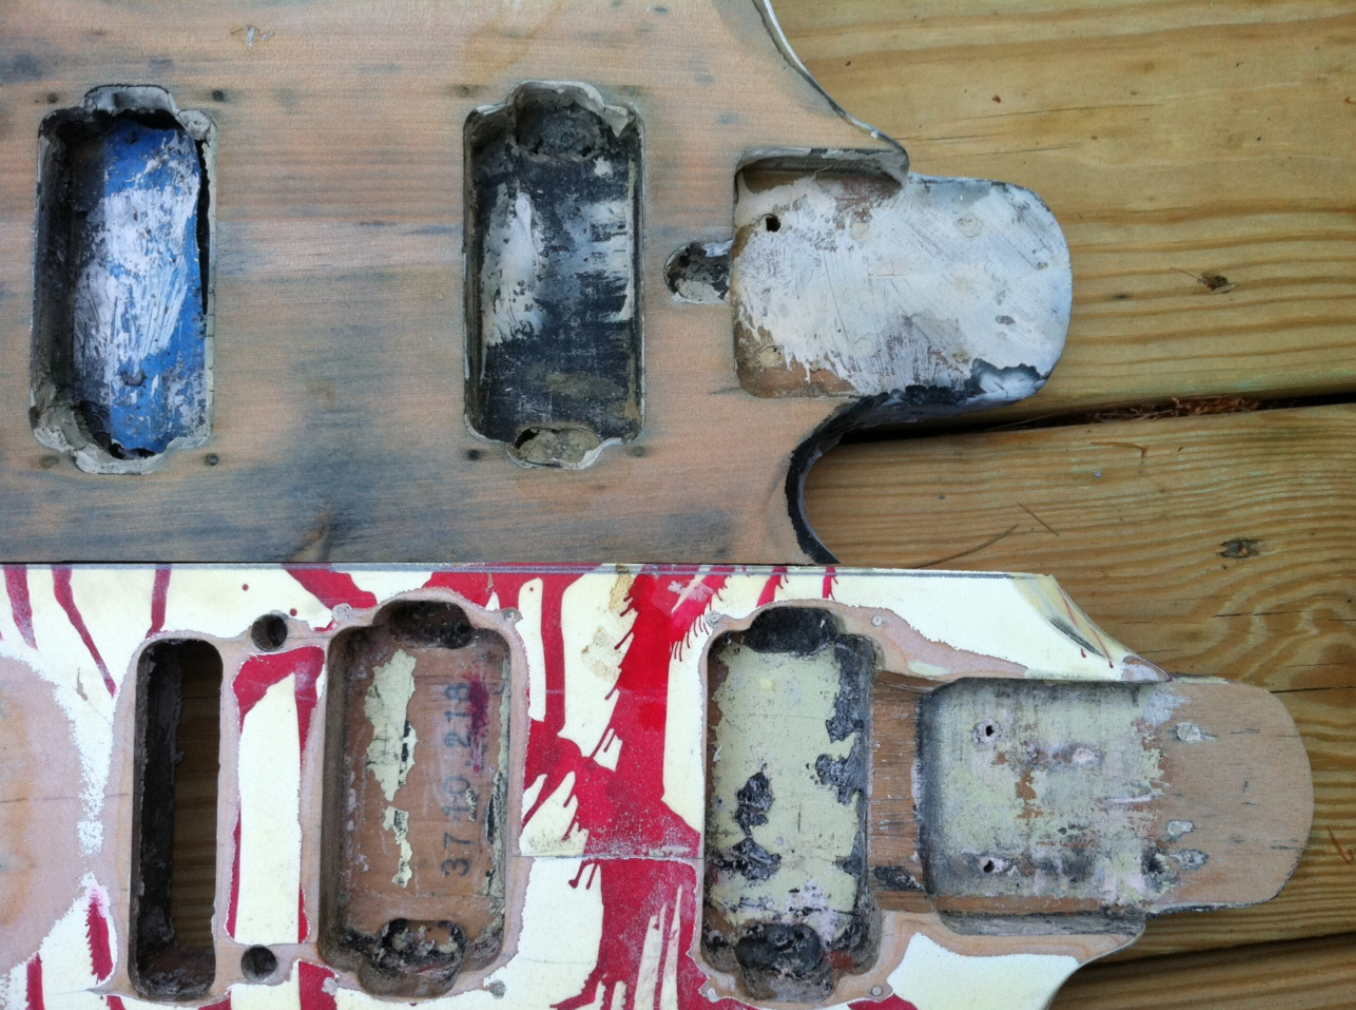
I got around to using paint stripper (Citristrip) on both bodies as well as the neck headstocks early in 2011. After stripping the paint, I was able to look closer at the cracks in the bodies. One had the top horn broken off (see blood-splattered paintjob), and the other had a pretty bad crack through the lower third, right through where the volume and tone control were.
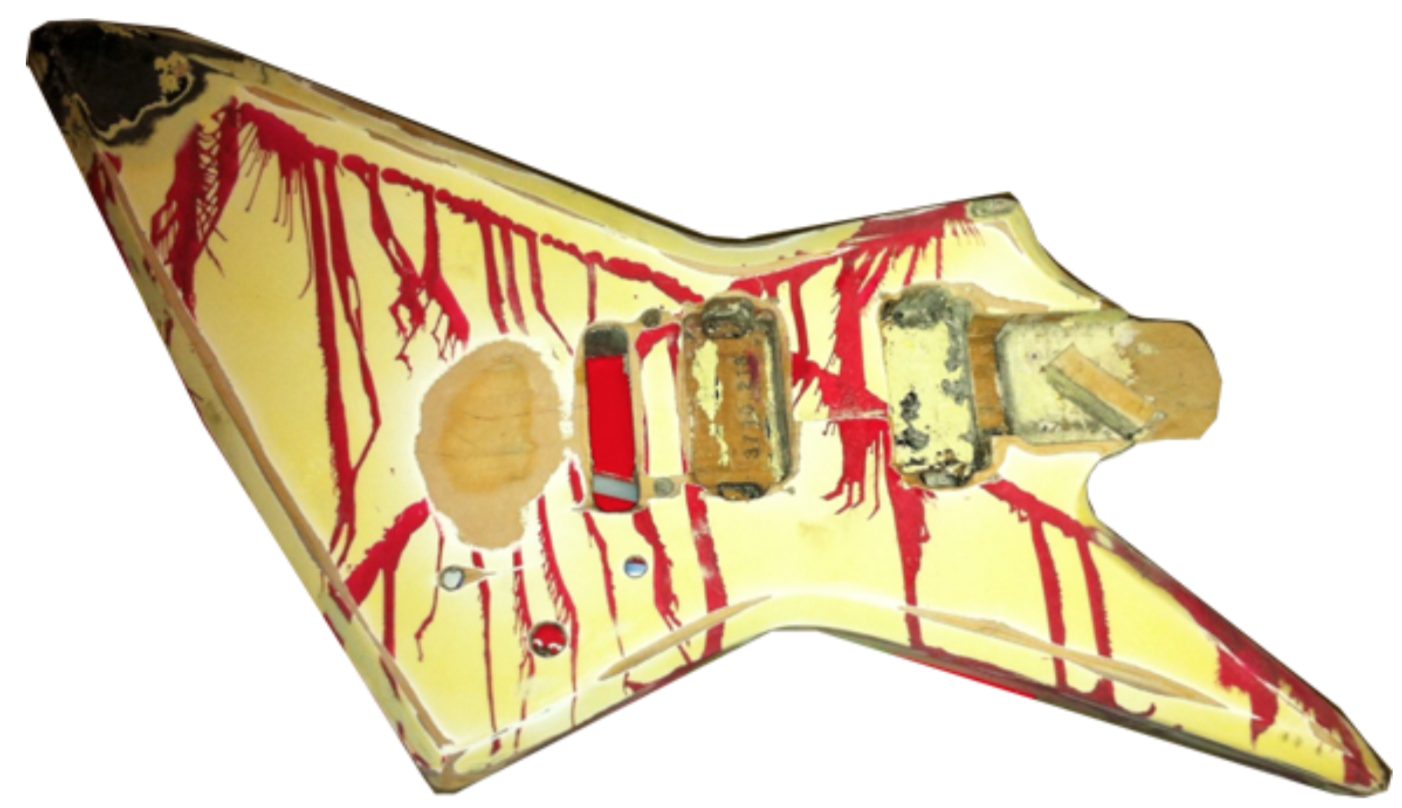
I glued the unbroken body back together and was going to restore a guitar and make it look similar to my 1985 ZZ, but wondered what to do with the other body and neck. Someone on talkbass.com suggested I make something like James Hetfield from Metallica’s doubleneck.
Acquiring Parts
Weeks were spent looking for parts and selling the gold hardware from the original guitar. Some of the gold was wearing off, and I am not a fan of gold hardware anyway, so off to eBay they went along with the 24-fret guitar neck (I kept the 22-fret). I looked and looked for a reasonably priced Aria Pro II bass neck with 4 inline tuners to match the guitar neck, but couldn’t find any in my price range. I decided to go with chrome hardware for the tuners, bridges and knobs, and since the humbucker pickups I had were mismatched brands, I went with black plastic pickup covers for a similar look to the Hetfield doubleneck.
For the bass neck, I had a 70’s Fender Jazz copy neck that I had thought about using (similar look to Geddy Lee’s Jazz), but it really didn’t match well. A maple fretboard with black squared inlays just didn’t go with the guitar’s rosewood with standard circle fret markers. Some digging around talkbass.com’s classifieds led me to a Peavey neck. It had a similar headstock as the Aria Pro neck I already had, so I was able to trade my Jazz copy neck for the Peavey. The bass tuners were the Fender style, and did not match the guitar tuners. I found some tuners similar to those that originally came on Aria basses of that time, and had to find some kind of bushings so the tuners would fit in the bass neck’s existing holes.
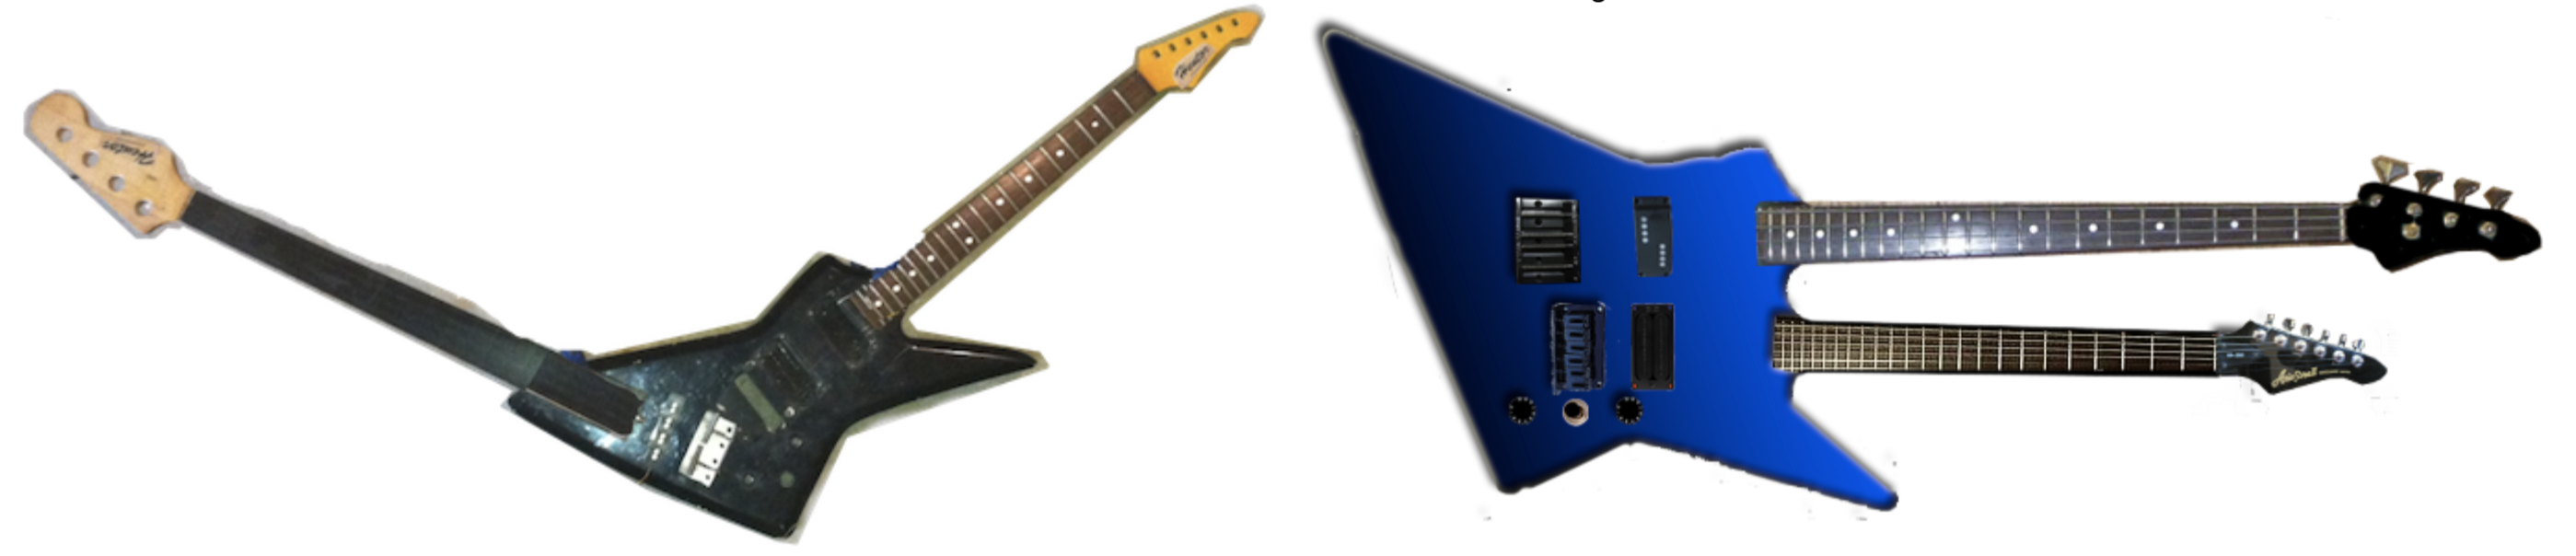
Joining and Mocking Up
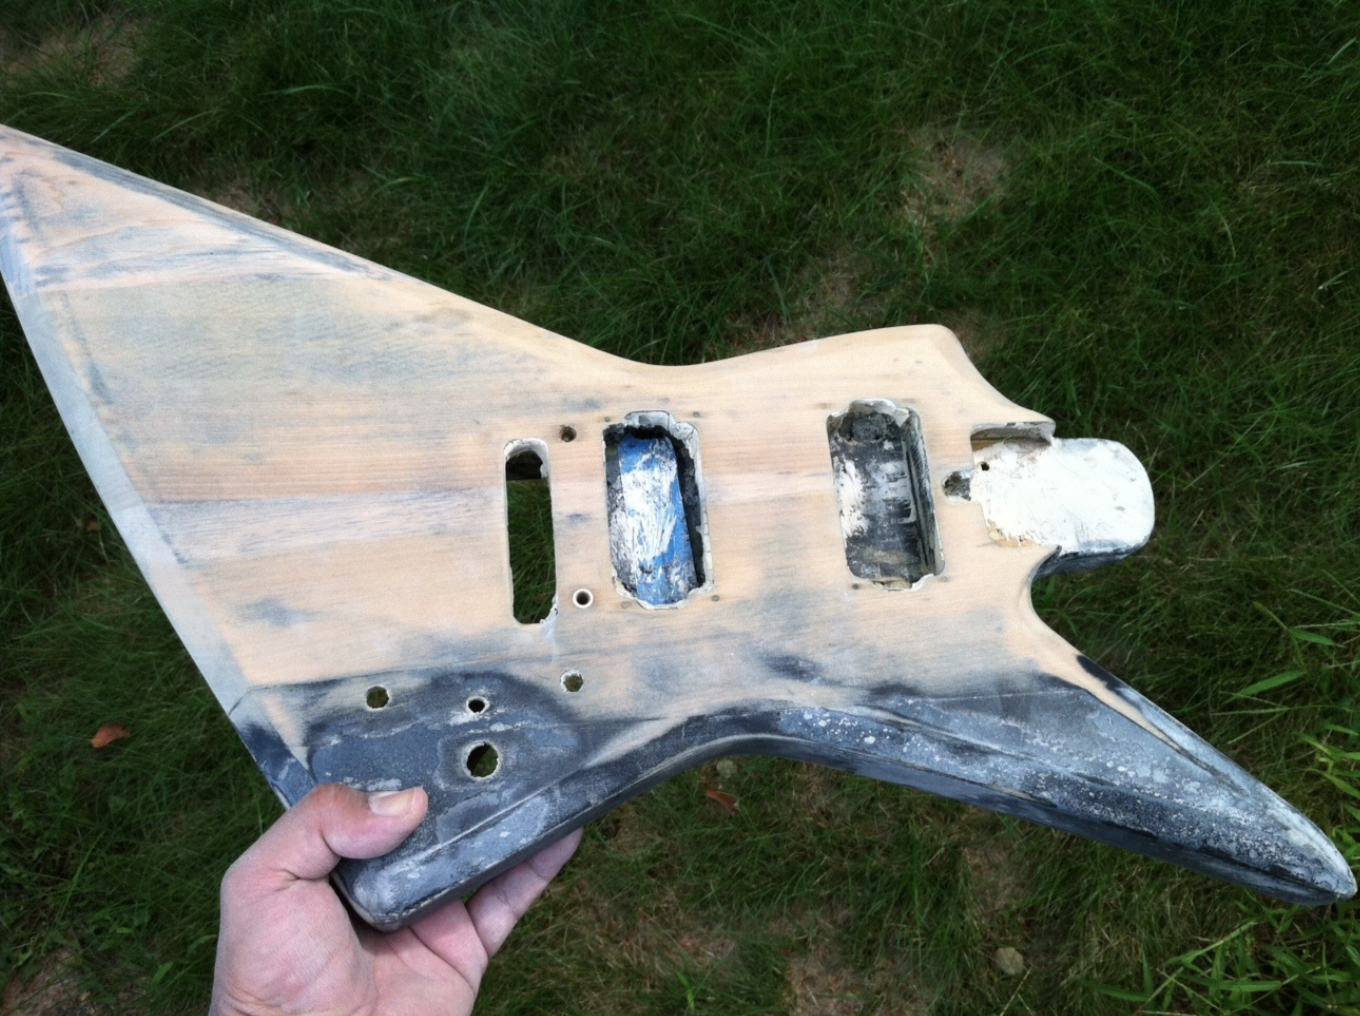
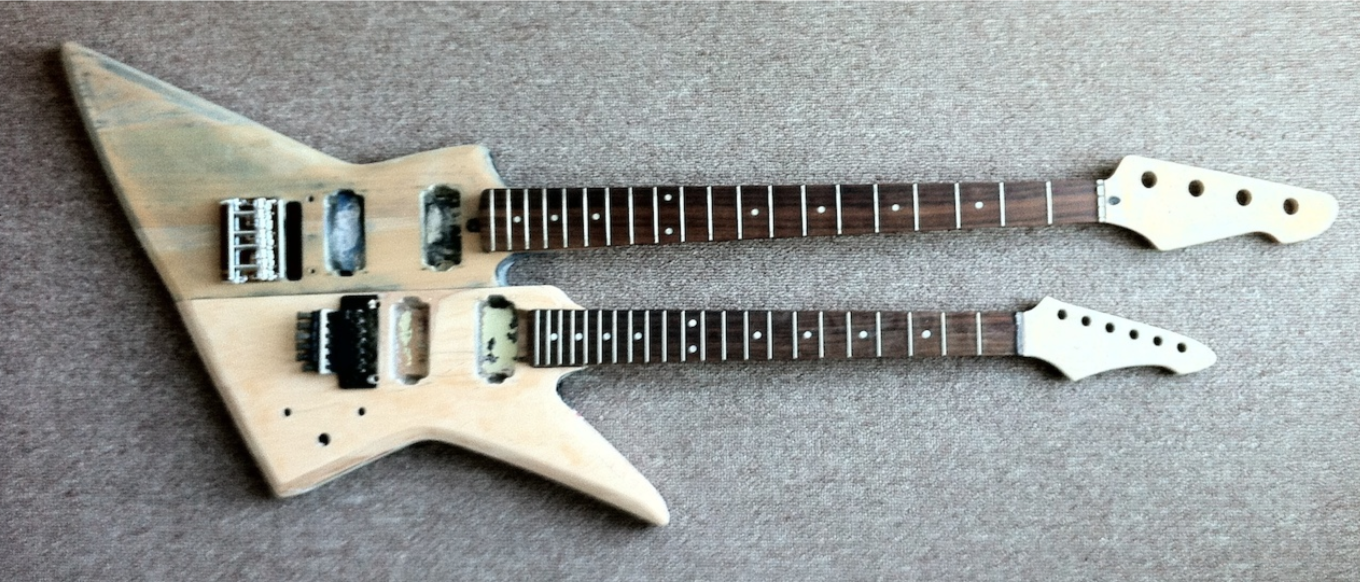
Measuring about thirty times, and cutting once, I cut the two bodies on my trusty table saw and took the above photo.
One thing that ended up haunting me later was a little piece of the body that broke off in between the guitar (bottom half) neck cavity and the neck pickup cavity. “No big deal,” I thought, and decided to place the guitar neck right up against the neck pickup. A little filing and chiseling made the neck pocket longer and I trimmed the excess neck pocket material so it wouldn’t be in the way if I played high up the neck. More on this later.
 The bass half (top half) had a hole where the original guitar tremolo was, and since I didn’t have a bass tremolo to put on it, I had to plug up that hole. I had plenty of spare wood from the pieces that I had trimmed off both bodies, so I cut some to size and glued them in. I used my table saw as a makeshift jointer to make the halves fit better, but I still needed to fill in the long seam, so I bought some Bondo. I read a few articles on using Bondo with guitar and bass bodies, and this seemed perfectly acceptable. The outcome was not bad at all after a few coats of the stuff along the seam as well as over the plugged tremolo hole. Before the Bondo, I used some sawdust from the body mixed with wood glue to fill in the smaller holes, something I had seen on an episode of Pawn Stars. That worked great too, and I was impressed at how hard that stuff dried!
The Peavey bass neck was really close to the Aria headstock shape, and I ended up trimming a little off of the Peavey neck so it matched a little better. I could have trimmed more, but I was really nervous doing this to begin with. My newly acquired band saw had definitely come in handy for this as well as smoothing out the transition in between necks.
Along the longest edge, the bodies didn’t quite match up as I would have liked. A quick rip of the table saw flattened that long edge and I am happy with the way that came out. I did have to reshape the edge routing so it matched the other sides of the body.
Painting
The next issue for me was color scheme, and where to get it done. Since I was doing this project on a shoestring budget and don’t know any professional painters who would work for free, I decided to paint it myself. I spent days combing the ‘net finding various sites and threads on message boards about DIY instrument painting with spray paint. Nice work could be done with off the shelf colors and cans. It seemed pretty straightforward, so I gathered as much information as I could, along with wetsand paper and paint, and tried it myself.
When I finally got ready for paint, the weather here in Southern New Hampshire was getting colder and wetter. I decided (foolishly as I found out later) to spray the doubleneck body in the garage, then move it to the basement so it would dry in a warmer temperature than my 45 degree garage. A jig was built to hold the body in place with the big point facing the ceiling and set up cardboard and plastic sheeting to keep the paint at bay. And a big fan blew the fumes out under the garage door. (I thought I had a photo of the body in the paint jig but I can’t seem to find it.)
This took about a week or so to get the painting and sanding done, and during this time around Halloween we had a freak snowstorm. The temperature and humidity was all over the place, and inexperienced me trudged on hoping to finish the project before Christmas. I used a French Vanilla-y color from Valspar (Lowes).
Final Touches
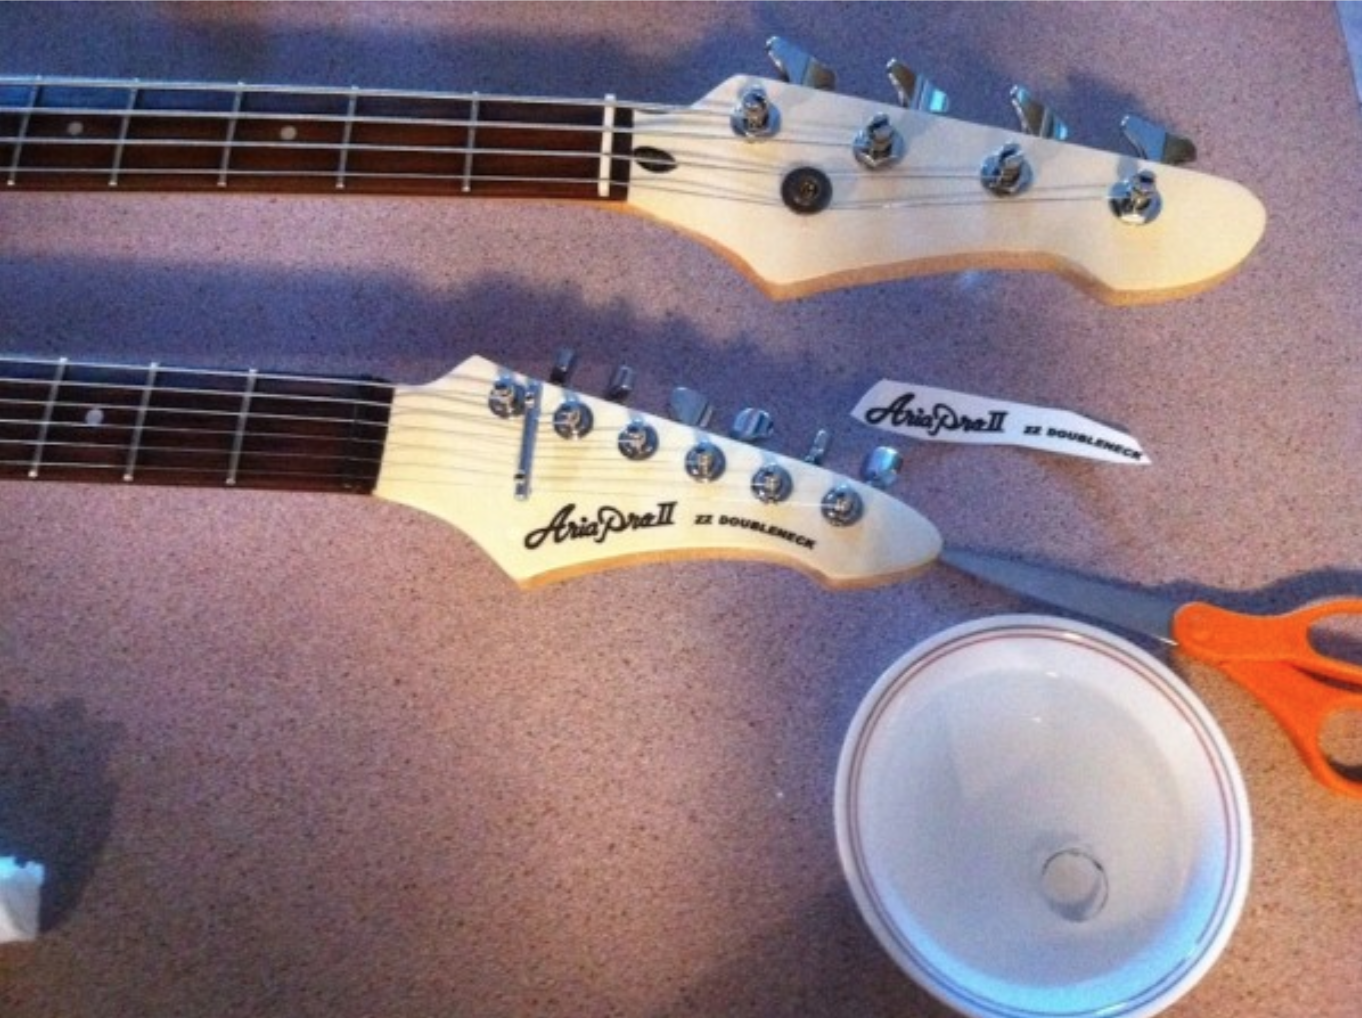
Getting all of the parts rounded up, taking inventory of what I had versus what I thought I had was nerve racking. The water slide decals I bought over three years ago turned out to have a white background…whoops! Too late to return those, eh? Hobby lobby sells the Testors brand CLEAR decal paper.
The screws I had for the pickup mounting rings were too big (luckily Home Depot had some in black!) and plenty of other things went wrong including the piece of the body that broke off in between the guitar’s neck pickup cavity and neck pocket.
This little piece of wood ended up giving me the biggest headache of all. Without thinking, I cut the excess neck pocket (the part that the neck sits on and is screwed to the body) and mounted the neck without issue. One night after the kids were in bed, I decided to intonate the guitar and bass. Without knowing, I inadvertently changed the scale length of the guitar which would keep me from properly tuning the guitar. This was apparent when I tried to play a simple G chord–it sounded horribly out of tune.
I had two choices, use a fixed, non-tremolo bridge, or move the neck back to its original position and find a piece to fit in between the neck and the neck pickup. Using a fixed bridge would be fine, because I originally bought one a while back but decided not to use it because it was black and the rest of my hardware is chrome. This would require me to fill in the hole where the tremolo was, and move the bridge position back on the body to accommodate for moving the neck closer to the pickup. Too much work, I decided since I had already painted and clear coated the body.
The other option was moving the neck back to its original position, which is what I did. There are two extra visible holes in the neck pocket and the neckplate extends past the body, but not much I can do about that now.
This project taught me a lot, especially to accept who I am: NOT PERFECT. I’m not, and the doubleneck is not either, and I’m okay with it!
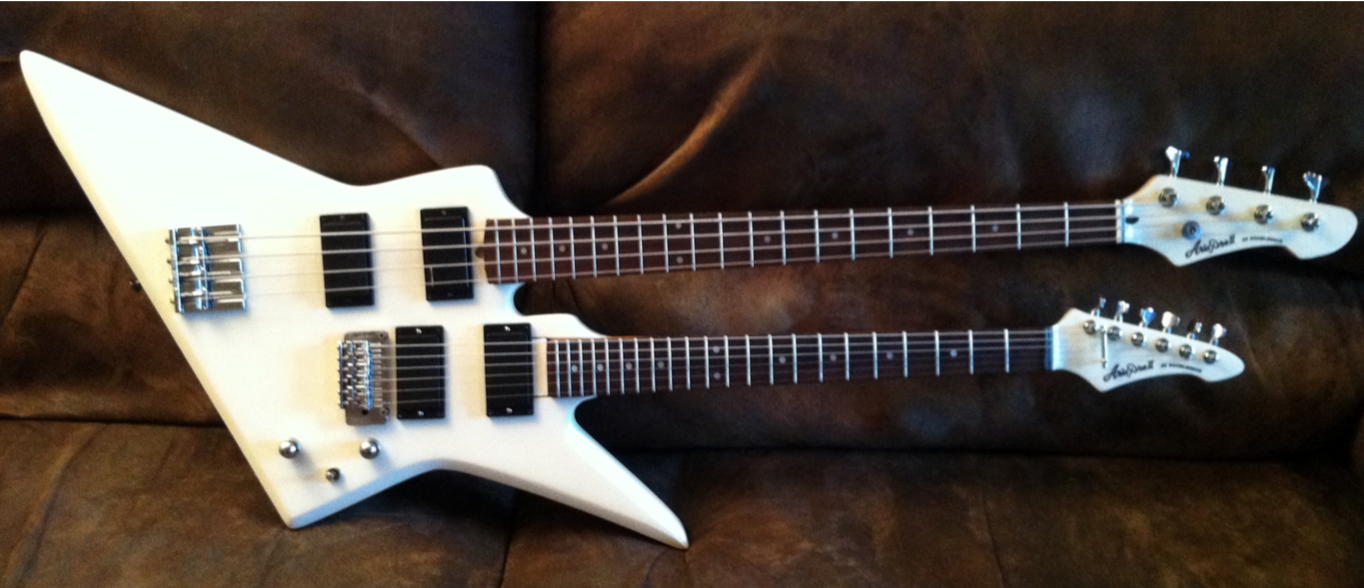
Without Further Ado
Thanks to my lovely wife and kids, and to all of those brains I picked along the way for suggestions and information, especially John Roberts and the guys and girls at talkbass.com.