
I have always been fascinated by Brian May’s Red Special guitar and his unbelievable tones. Ever since my sister listened to Queen’s A Night At The Opera and A Day At The Races even before I ever learned to play the guitar, I’ve been hooked. The fact that Brian and his dad MADE the guitar is even more unreal. That and the fact he has been playing and touring with that guitar since the early 1960’s is mind boggling!
Lately there have been a few Red Special copies floating around in my window shopping adventures, such as the Harley Benton BM-75, which seems like a crazy bargain at less than $300 US. Since Facebook knows what we’re thinking and talking about, I was not surprised when a Red Special knockoff came up in my Facebook Marketplace feed, and me being someone who likes different, well this was right up my alley.
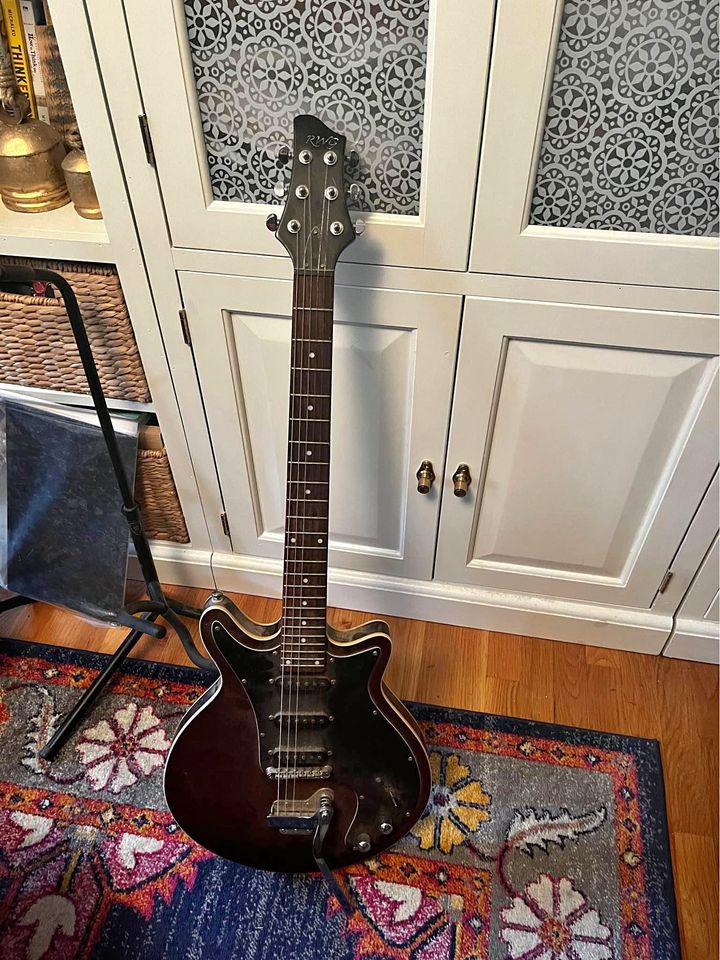
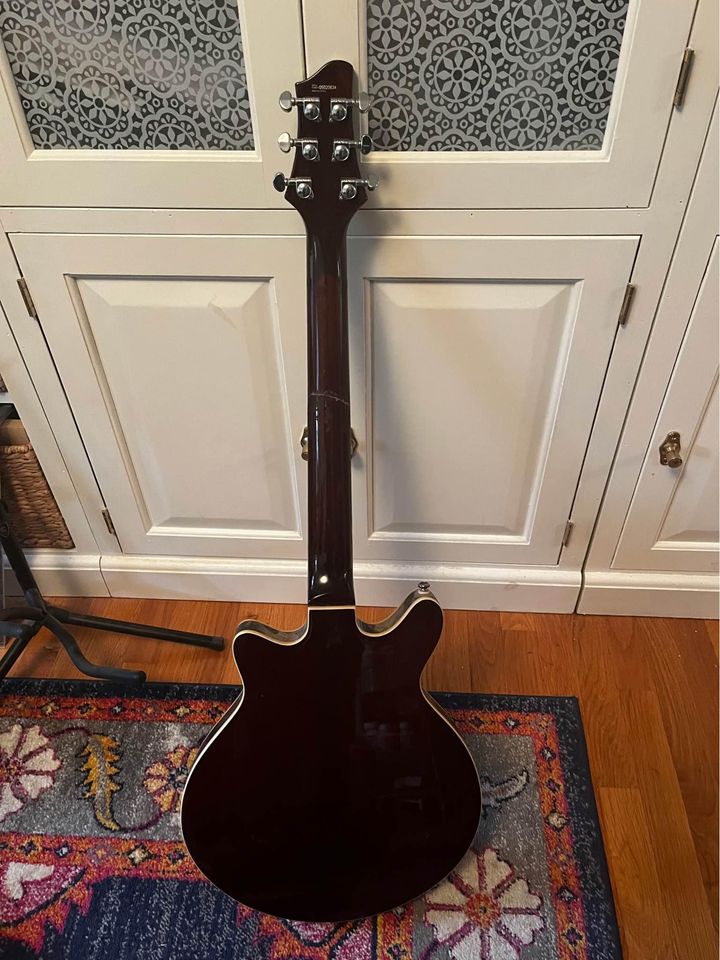
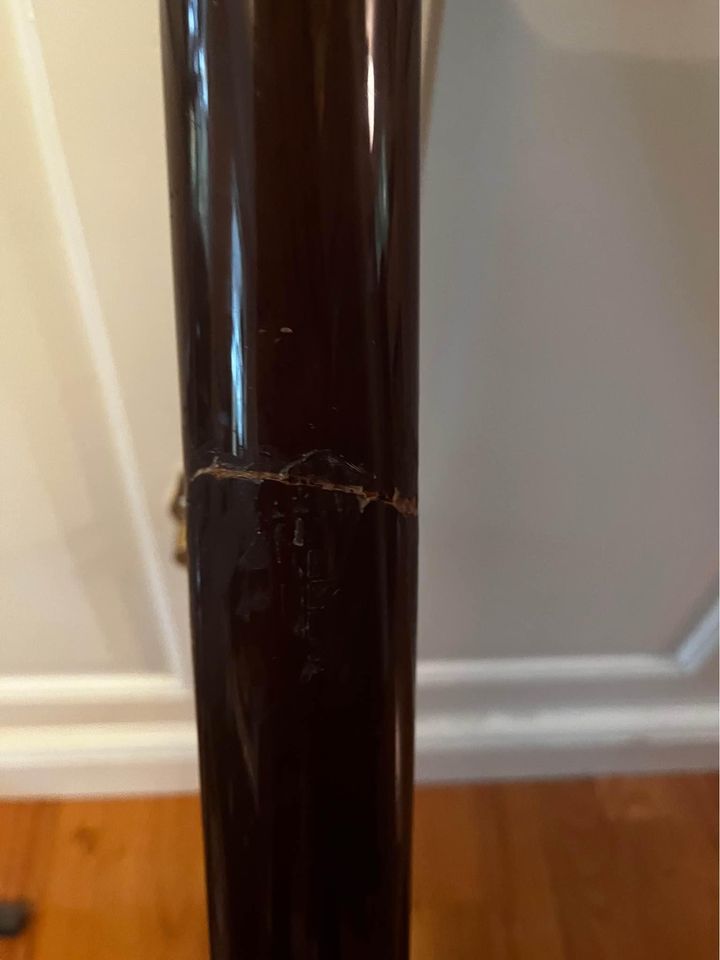
(famous last words)
Huh, it looks kind of brown in the photo. RWG (I have a feeling the link for RWG is some kind of AI-generated site)? Never heard of that brand. I wonder if I can reshape that headstock to something more like a Gibson Flying V’s rounded one. What’s the catch, it’s been marked down from $250 to $50? Ahh, it’s got a bad neck repair, right in the middle of the neck, not a headstock break like most are. That’s a really bad repair. Hopefully the dude didn’t use epoxy instead of wood glue.
While I creeped the seller’s Facebook profile, I saw he was a college student and a bit of a guitar reseller, probably someone who has discovered flipping gear like I used to. That tremolo is weird though, it looks like it’s from a 1970s Japan-made guitar. That’ll have to go. At $50, I figured I’d ask the dude if I can see it.
After trying to schedule a meet-up with the seller for a couple of weeks, I finally was able to take a 1/2 hour drive to a Burger King parking lot where we’d meet up. He looked a lot younger in person versus his Facebook profile; his mom drove and waived at me when I pulled in. I took a look at the Brown Special (as I’m calling it), he looked nervous while I decided if it was worth the $50. The Grover tuners are worth that by themselves. The neck break is very, very poorly repaired. I’m assuming the seller did it, even though he said the previous owner did it. Okay, sure thing, pal. What, you couldn’t wipe off the excess glue!? Okay, $50 is a deal. It still amazes me when people don’t simply dust stuff off before they sell it. It was so filthy!
Before I go buy a bunch of replacement parts and add-ons for this, such as a Gibson-style short vibrola, six Fender Jaguar-style switches, Burns pickups or anything else, let’s get the neck break sorted, shall we? Then, maybe I won’t have to buy a replacement neck. Did I mention I’m fairly certain I have a few sixpence coins somewhere in my coin collection?
Window Shopping For Parts
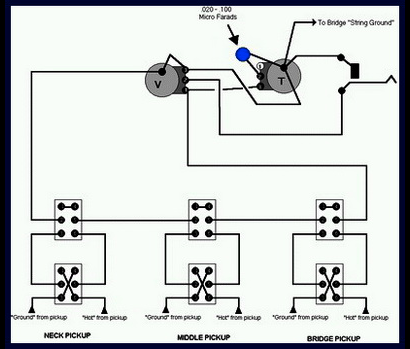
I’ve done quite a bit of research into how Brian and his dad put that guitar together, from the wiring to using various parts that they had around the house, from lumber to a knitting needle to use as a tremolo arm. Here are some pickup wiring diagrams I came across. Interesting reading and one of the pieces of magic of Brian’s many guitar tones.
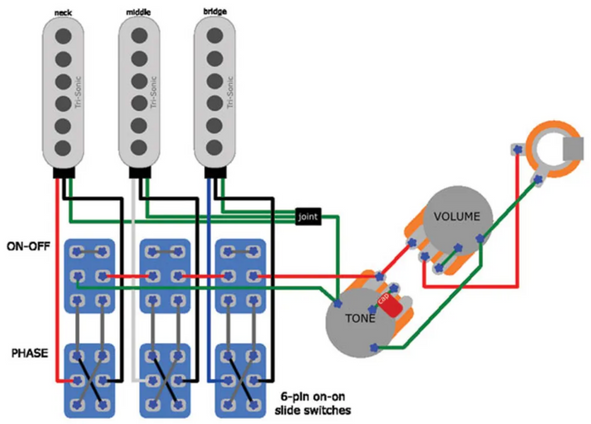
I was looking for some of the volume knobs for my project and couldn’t find any decently priced ones because they’re all milled from aluminum. What I did find was an incredible website of the guy who did the refurb on Brian’s guitar, complete with all of the measurements he used to build the replicas that Brian takes on tour! Mind blown! With a schematic of the control knobs, I was able to make my own in CAD. Fire up the 3D printer!

Fixing The Neck
I read about dissolving wood glue with denatured alcohol, so I figured I’d give it a shot with a paintbrush. It couldn’t get much worse than that gluing job, so I had nothing to lose! First I loosened the truss rod, which still had quite a bit of pressure on it.
It took me a few ‘coats’ getting the wood to separate more and more with every pass. I was finally able to get the neck to open up and I was able to get a good amount inside too. I wiped the old glue-balls up and swept them out with a paintbrush and some compressed air and left it to dry over night.
The next day I did some test fitting of my clamps and in the process dented the back of the neck by tightening one of the clamps down too much. That made me decide that I needed something to help keep the neck straight while it was gluing up, something that the previous gluer did not do–it doesn’t look like they used clamps for that matter either!
After the glue-up (see video above), I threw some strings on it, adjusted the truss rod with a wince on my face, and to my surprise, it held up and straightened out nicely. I put a ruler on the frets and it looks good! It was time to continue, so I bought some wood filler and got to work.
The wood filler dried nicely, but it was way too rough and accentuated the break because it was so light in color. Some furniture touch up pens worked pretty well and after I sanded it down a bit, applied a few coats of superglue (yes, that’s a real guitar finishing hack), sanded and wet sanded it and it looks much better. Still not 100% back to the way it looked before the neck break, but it’s definitely playable now. Now to work on the pickup configuration and some other cosmetic stuff. Switches and a new tremolo arm are in transit.
Onto Wiring! 11/4/23
Here’s what I’ve come up with since there’s not enough room to put 6 switches on the pickguard, plus I think it looks a little cleaner. I found this excellent Google Slides wiring diagram template!
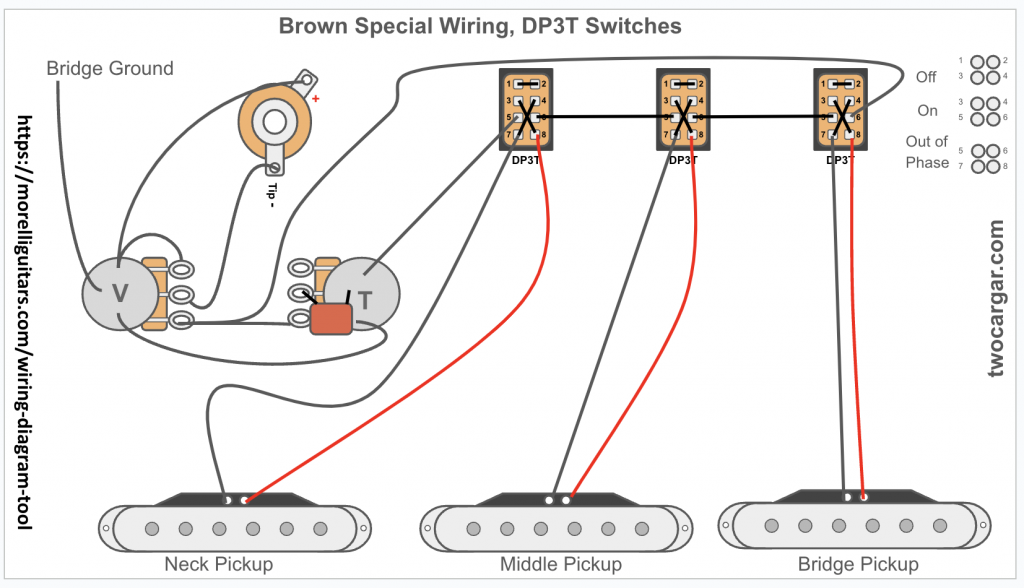
Let’s try this again, shall we? This time, I’ve added a jumper to pins/lugs 2 & 4 of the switches and removed the one from 1 & 2. That way, in any position, they will all be grounded at least and switching to the top position will just cut the one pickup out. (Update, yeah, that didn’t work either!)

Wiring Part 2, 11/8/23
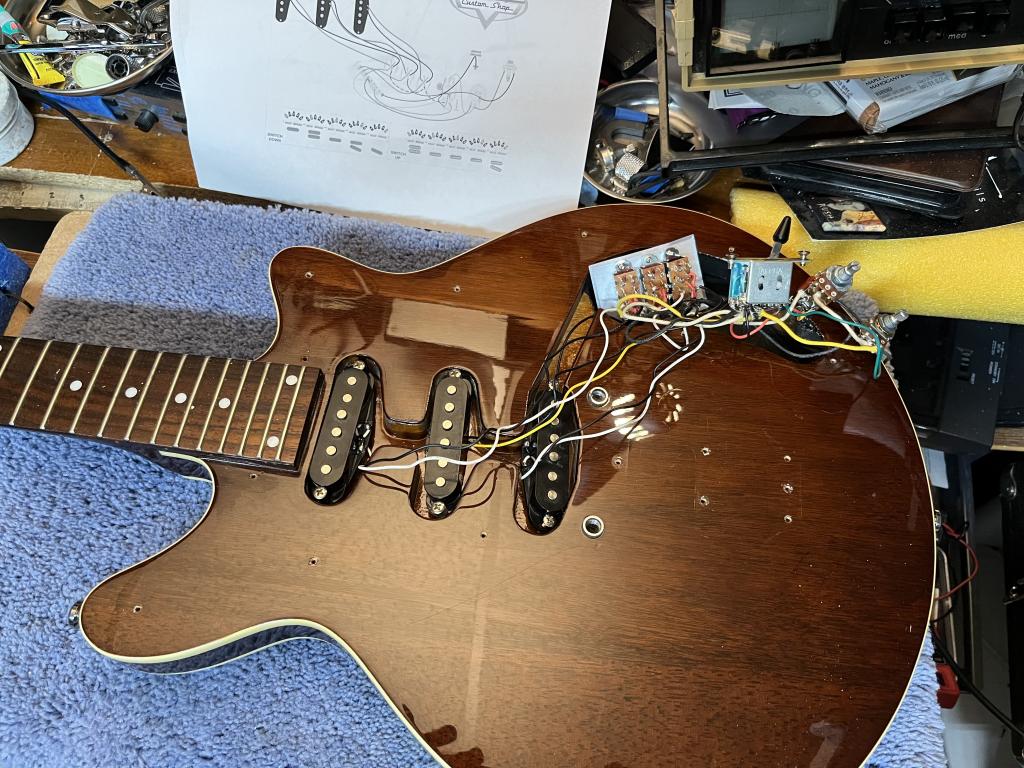
While my wiring diagram looked good on paper, it did not work at all. What I did find was a wiring diagram of a hot-rodded Harley Benton BM-75 that has a 5-way switch like mine and 3 switches for pickup polarity as well as a push-pull tone pot which ended up working well even though I have the triple-throw switches instead of double throw switches–I just left the last position blank for now.
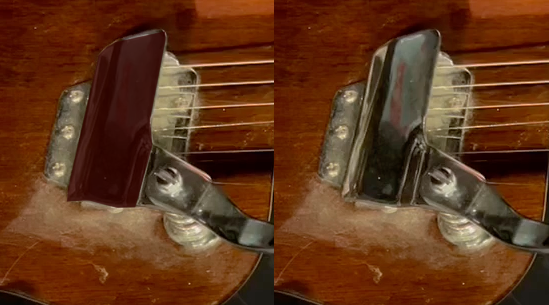
Some of the next things I’d like to do are either making a small pickguard/scratchplate for behind the tremolo like Brian’s or affixing some black vinyl onto the tremolo so it doesn’t look so bad. I also bought a better tremolo arm because this one is fugly.
Update November 11, 2023
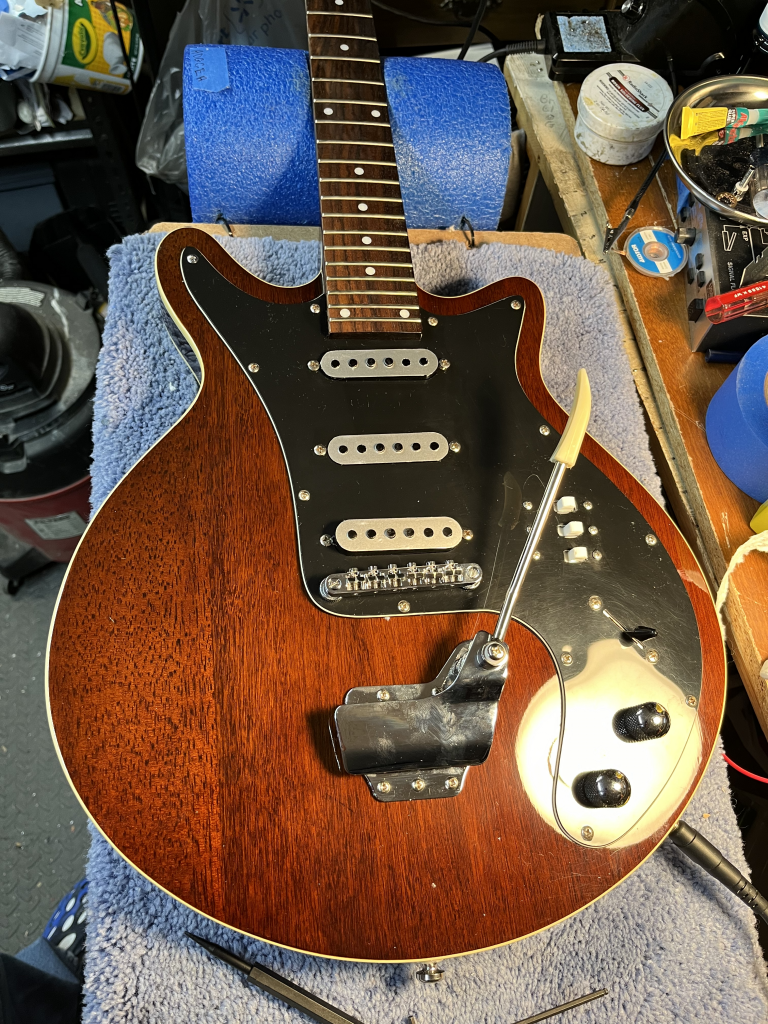
I spent some nerve racking time on the guitar this past weekend, getting the pickguard cut to receive the three phase switches for the pickups. After testing and re-testing the wiring after every component I mounted on the pickguard, it was finally time to mount the pickups in the ‘guard. This is something I started doing because I had a bad habit of screwing the pickguard down then testing the wiring on other projects, only finding that something was not working right or a wire had come loose, etc.
I had also been thinking about using some leftover silver vinyl from my Akira Takasaki build to make the pickup covers look more like the Burns chromed pickup covers from Brian’s. For the pole pieces, I used black furniture touch up marker and that came out pretty good. The end result was something I am happy with. Next step is to cover up the tremolo with black vinyl. And speaking of tremolos, I got the vibrola arm in and it looks 100% better than the one that came with it. The plastic bit on the end of the arm was a little long, so I cut it down. I’m still debating 3D printing one like Brian’s because I have to re-do the knobs I 3D printed because they’re too shallow. When I went to put them on, the shaftwas way too long and I don’t have enough room (depth) to mount the pots lower in the pickguard.
Last update November 13, 2023